
Spring Cloud: API-Gateway And Naming-Server Concepts
Posted on April 9, 2024 • 7 minutes • 1411 words • Other languages: Español
[EDIT]: Removed ranting about personal life that didn’t add value to the blog.
DISCLAIMER: this is not a copy-paste of Master Microservices with Spring Boot and Spring Cloud Udemy course. I highly recommend buying that course. I wrote all the code shown below. Enjoy.
- Check The Code!
- What’s An API-Gateway?
- Example
- A Look Into API-Gateway Code
- Naming-Server
- Some Considerations
- Let’s Get This Thing Working
- Next Steps
Check The Code!
You can check the code in the following repos (in all of them, stick to the branch feature/docker-compose. You may find other branches, that’s me experimenting with other solutions).
What’s An API-Gateway?
Let’s analyze this diagram:
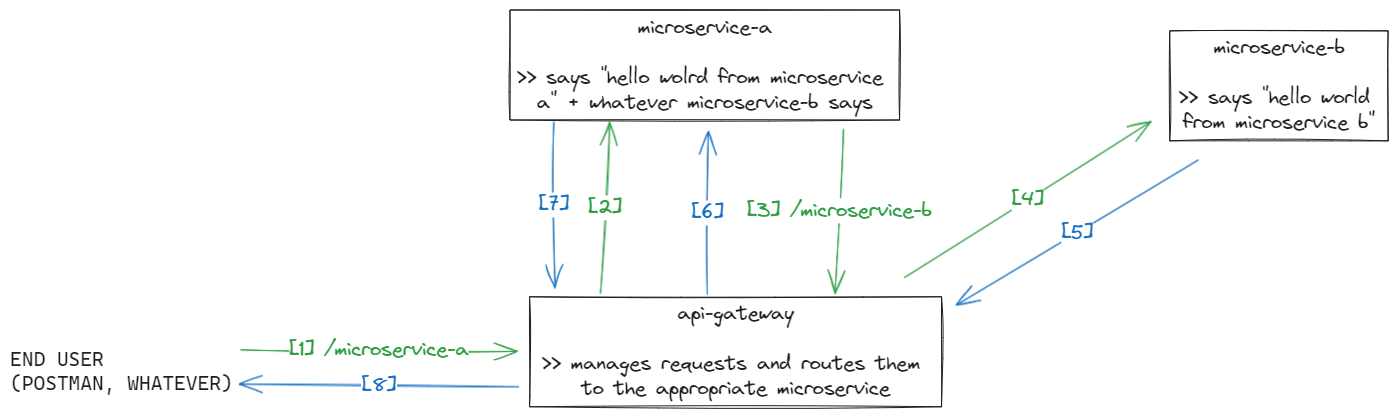
We have:
- An end user: someone who needs something from
microservice-a. microservice-a: it returns “Hello world from microservice A” + whatevermicroservice-bhas to say. So it depends onmicroservice-b.microservice-b: it returns “Hello world from microservice B”.
So far so good. So… what’s that thing “api-gateway”?
An API Gateway is the front door to your application, ensuring that every request is directed to the correct destination. This gateway serves several critical functions and can be leveraged in various use cases:
- Routing: The gateway directs incoming API requests to the appropriate microservice, enabling a client-side application to make requests using a single endpoint rather than having to manage URLs for each service.
- Load balancing: It distributes incoming requests evenly across instances of a microservice, enhancing the system’s scalability and reliability.
- Authentication and authorization: The gateway can authenticate incoming requests, ensuring they are from a valid source, and optionally enforce access controls, deciding which services a valid request may or may not access.
- Rate limiting: To prevent any single service from being overwhelmed, the gateway can throttle the number of requests to a service over a period.
- Cross-cutting concerns: It can handle other concerns such as logging, monitoring, and security across all services without requiring duplication of effort in each microservice.
- Aggregation: The gateway can aggregate results from multiple microservices and return a consolidated response to the client, reducing the number of round trips between the client and server.
Use Cases:
- E-Commerce applications: In an e-commerce system, the gateway can route product search requests to the product service, cart management to the cart service, and order processing to the order service, providing a seamless shopping experience.
- IoT applications: For Internet of Things (IoT) platforms, the gateway can manage requests from millions of devices, routing them to the appropriate services for data processing, device management, and analytics.
- Mobile applications: Mobile backends can leverage API Gateways to simplify client-side communication, handle different back-end versions, and aggregate data from multiple sources.
By acting as the central point for managing and directing traffic, a gateway microservice enhances the maintainability, scalability, and security of cloud-based applications.
Example
Let’s analyze the diagram, again, with more focus on the step by step.
- Someone calls
api-gateway/microservice-a.api-gatewayreceives this request and does whatever it is coded to do with said request (could maybe add a header, check auth, encode/decode info, or just be transparent and do nothing). api-gatewayknows wheremicroservice-ais and passes the request.microservice-areceives the request. It needs something frommicroservice-b, so makes a new request that goes through the gateway.- Again,
api-gatewaydoes whatever it is coded to do with this new request tomicroservice-b. It knows wheremicroservice-bis and passes the request. microservice-breceives a request, processes it, and returns.api-gatewayreturns.microservice-adoes what needed to do withmicroservice-b’s response, and returns.- Final response.
Could you’ve saved a few requests /responses by going straight from microservice-a to microservice-b? Yep, totally. Just for example purposes, I decided to do it this way. Maybe your reality needs to save those extra requests, or maybe it needs to always go through the gateway. Each reality is different.
A Look Into API-Gateway Code
When you get into the api-gateway code, you notice something… It is very empty.
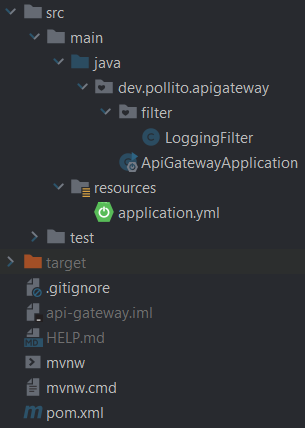
- The LoggingFilter is just a filter that logs whatever comes through. In this example, I don’t alter anything of the incoming request nor do any checking based on where it is coming from or where it is going. Here is where you can get creative.
- The main application file is just an empty default Spring Boot main.
How does the api-gateway know where to send the requests? The answer is in the pom.xml.
<dependency>
    <groupId>org.springframework.cloud</groupId>
    <artifactId>spring-cloud-starter-gateway</artifactId>
</dependency>
<dependency>
    <groupId>org.springframework.cloud</groupId>
    <artifactId>spring-cloud-starter-netflix-eureka-client</artifactId>
</dependency>
The spring-cloud-starter-gateway dependency gives to the microservice all the gateway characteristics.
Here the star of the show is spring-cloud-starter-netflix-eureka-client. It registers your API Gateway as a client with the Eureka Server (a service registry). This enables the gateway to discover and keep track of the instances of microservices available in your ecosystem.
When a request arrives at the API Gateway, the following steps occur:
- The gateway identifies the route and the microservice to which the request should be forwarded based on the configured routing rules.
- The gateway consults the Eureka Server to get the current instances of the target microservice, including their network locations.
- The Eureka Server responds with the information about the available instances. It might return multiple instances if the target microservice is scaled horizontally for high availability.
- The gateway applies any configured load balancing strategy to select an instance if multiple is available.
- The request is forwarded to the chosen microservice instance for handling.
This combination of Spring Cloud Gateway and Eureka Client enables dynamic routing based on service discovery, making the system more resilient and scalable.
The API Gateway doesn’t need to be statically configured with the locations of microservices. Instead, it dynamically resolves them, accommodating real-time changes in the microservices landscape, such as scaling events or services going down for maintenance.
Naming-Server
Eureka Client registers microservices into a service registry. Now we need that, a service registry. I call it naming-server.
When you look into its code, you notice something… It is literally empty! Just the main Spring Boot class with an annotation.
@SpringBootApplication
@EnableEurekaServer
public class NamingServerApplication {

    public static void main(String[] args) {
        SpringApplication.run(NamingServerApplication.class, args);
    }

}
Again, all the magic is done by a dependency in the pom.xml file.
<dependency>
    <groupId>org.springframework.cloud</groupId>
    <artifactId>spring-cloud-starter-netflix-eureka-server</artifactId>
</dependency>
Some Considerations
Registering In Naming-Server
Every microservice that wants to be registered in the naming-server to be found by other microservices, needs:
- actuator + eureka client dependencies:
<dependency>
    <groupId>org.springframework.boot</groupId>
    <artifactId>spring-boot-starter-actuator</artifactId>
    <version>3.2.4</version>
</dependency>
<dependency>
    <groupId>org.springframework.cloud</groupId>
    <artifactId>spring-cloud-starter-netflix-eureka-client</artifactId>
    <version>4.1.1</version>
</dependency>
- This piece of code in their
application.yml:
eureka:
  client:
    serviceUrl:
      defaultZone: http://localhost:8761/eureka #or wherever eureka server is
  instance:
    prefer-ip-address: true
What Are Those Micrometer And Zipkin Dependencies?
The Master Microservices with Spring Boot and Spring Cloud Udemy course also comes with some content about logging and tracing, so I decided to implement them here as well.
Without getting too technical about it, those dependencies help with:
- Giving unique IDs to the logs.
- Passing down IDs through microservices, so then we can make a trace of where did the initial request go.
- Show in a dashboard the traces and metrics.
The only thing that had to change in the proper business code to make these dependencies work was:
- Adding some capabilities when building the Feign client. Here’s an example of it taken from
microservice-a:
@Configuration
@ComponentScans(
    value = {
      @ComponentScan(
          basePackages = {
            "dev.pollito.microserviceb.api",
          })
    })
@RequiredArgsConstructor
public class MicroserviceBApiConfig {
  private final MicroserviceBProperties microserviceBProperties;
  private final MeterRegistry meterRegistry;
  private final ObservationRegistry observationRegistry;

  @Bean
  public HelloWorldApi microServiceBApi() {
    return Feign.builder()
        .client(new OkHttpClient())
        .encoder(new GsonEncoder())
        .decoder(new GsonDecoder())
        .errorDecoder(new MicroserviceBErrorDecoder())
        .logger(new Slf4jLogger(HelloWorldApi.class))
        .logLevel(Logger.Level.FULL)
        .addCapability(new MicrometerObservationCapability(observationRegistry))    // <-- THIS IS NEW
        .addCapability(new MicrometerCapability(meterRegistry))                     // <-- THIS IS NEW
        .target(HelloWorldApi.class, microserviceBProperties.getBaseUrl());
  }
}
- Adding some configs in the
application.yml:
logging:
  pattern:
    level: "%5p [${spring.application.name:},%X{traceId:-},%X{spanId:-}]"
management:
  tracing:
    sampling:
      probability: 1.0
Let’s Get This Thing Working
Use the docker-compose file to get everything started. I won’t go into details on how docker compose works. This is a Spring Cloud blog, not a docker one.
I personally like to use docker desktop for these things, but you can go full CMD.
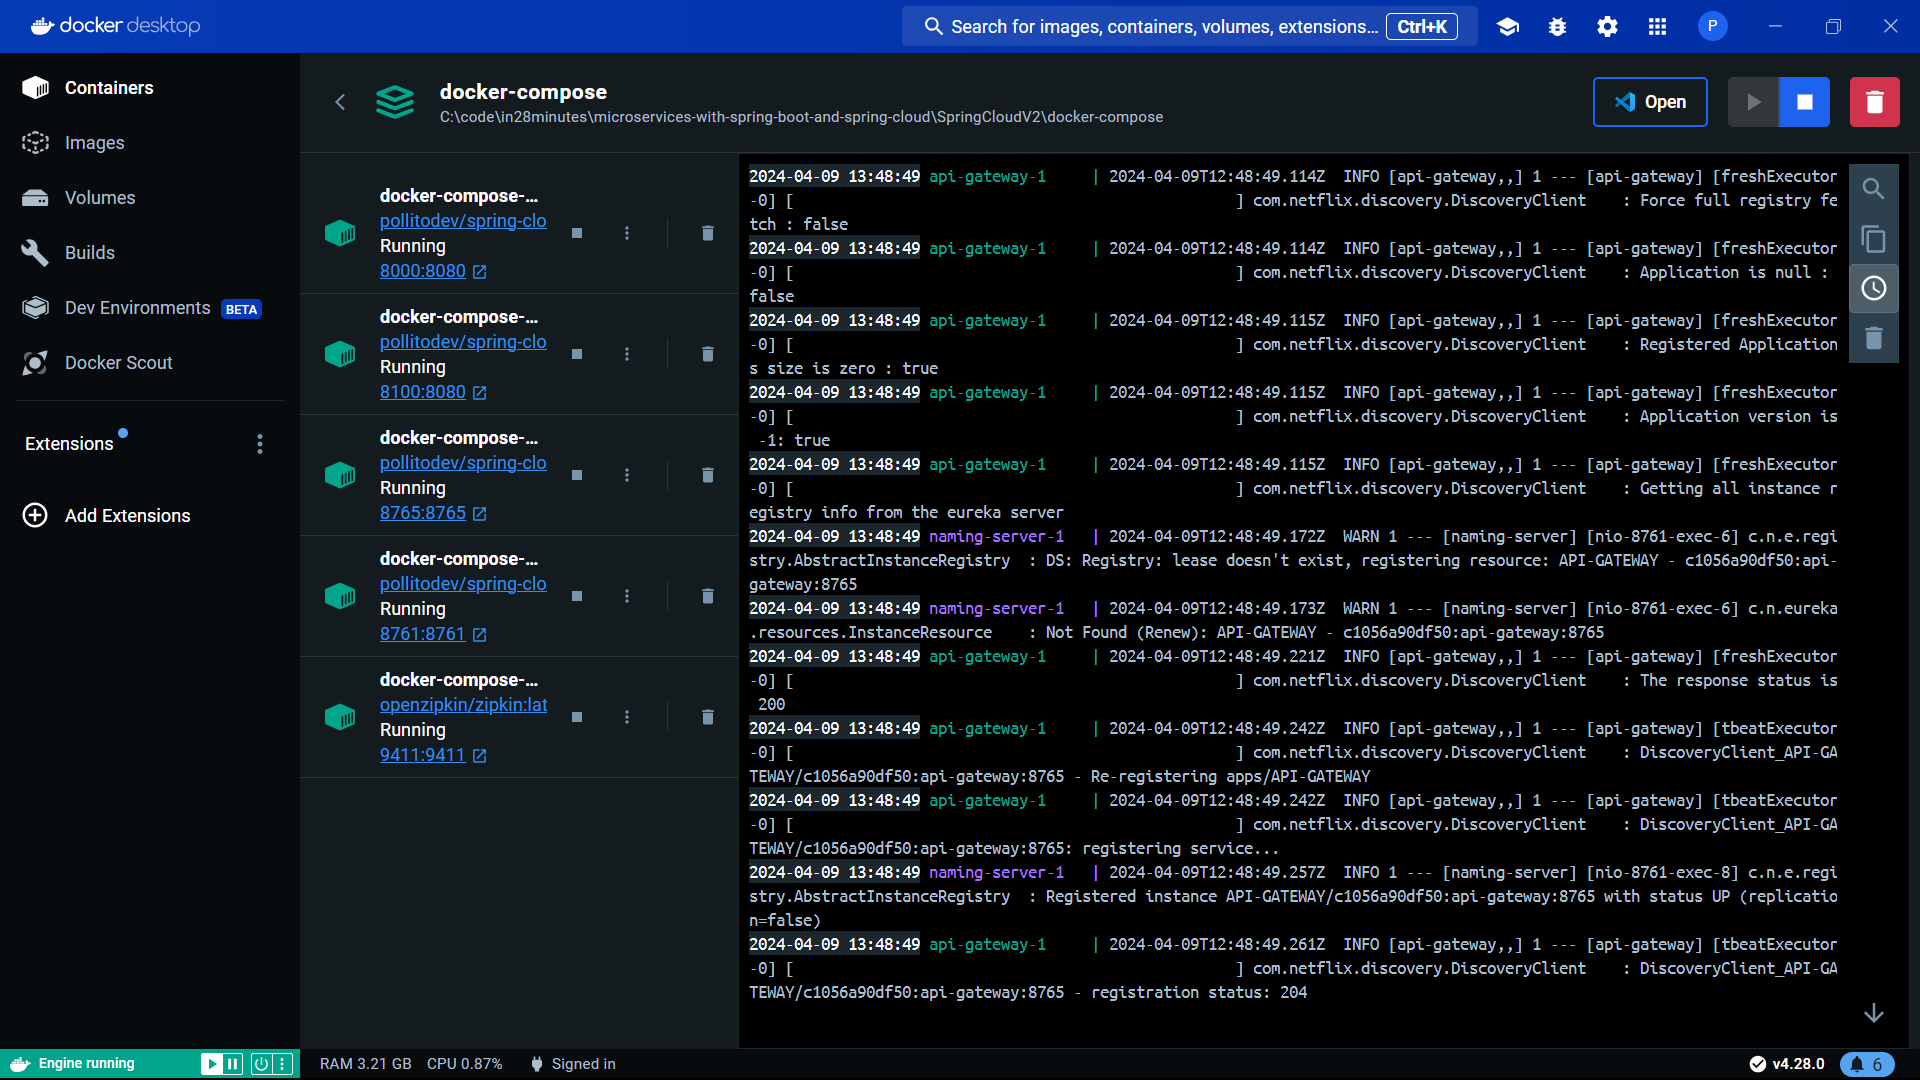
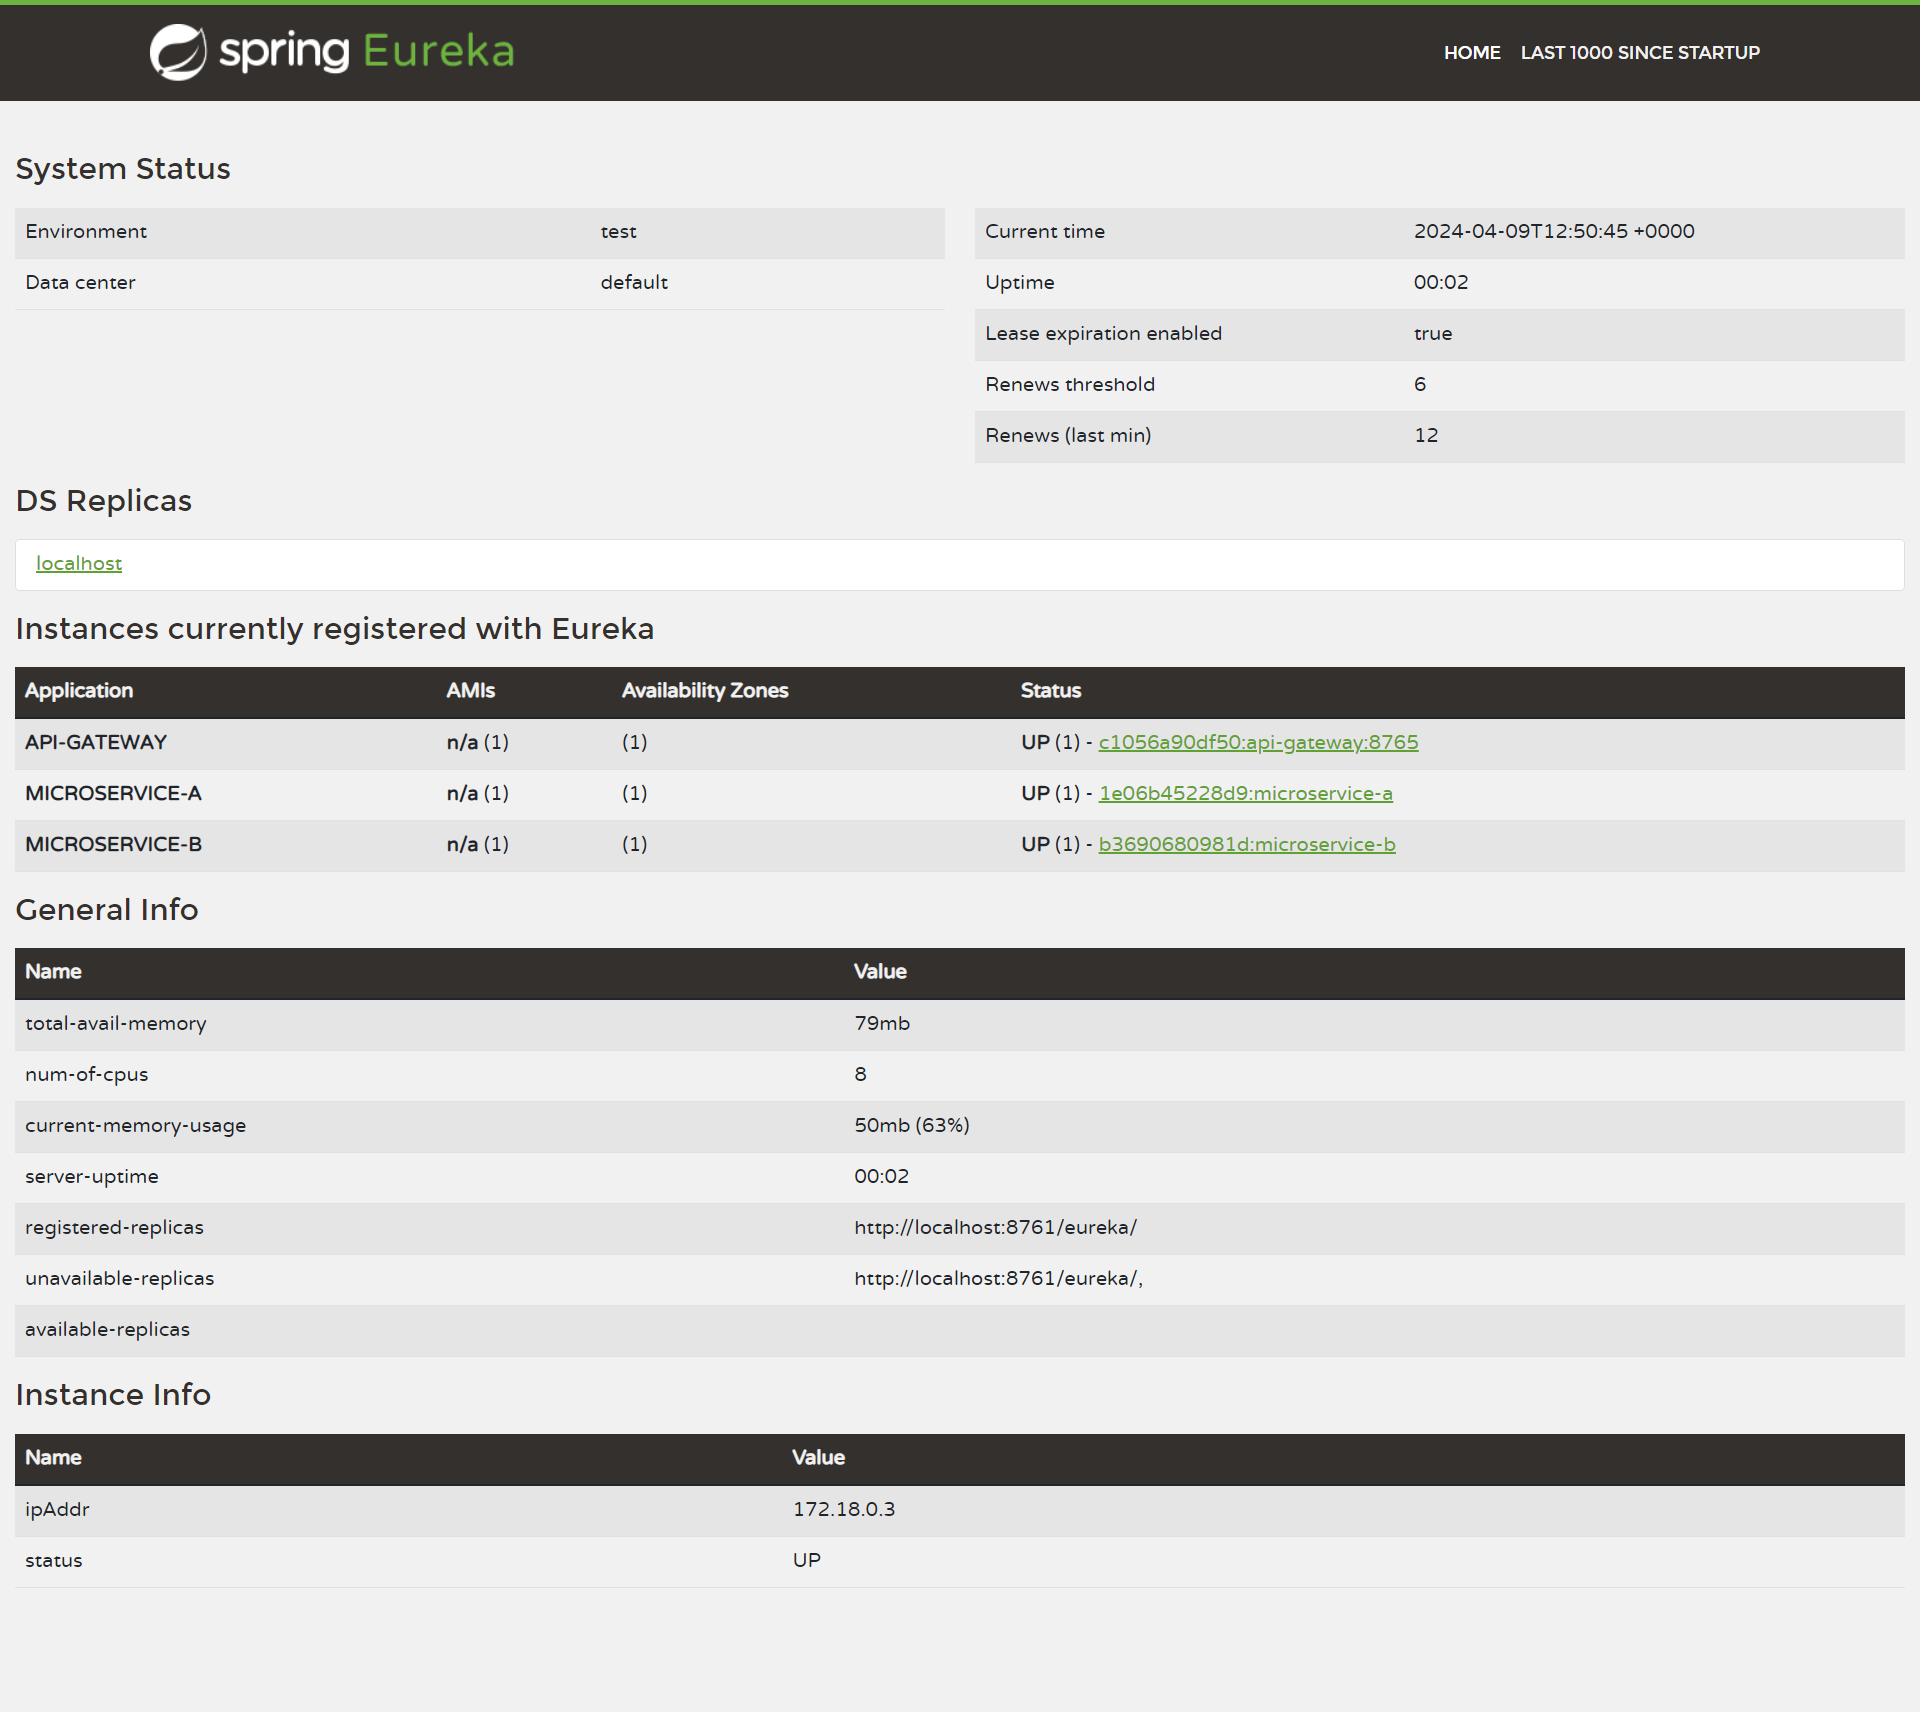
If you check localhost:8761 , you’ll find the Eureka Server with all the services that got registered.
Executing this curl will make the whole process of going through the api-gateway, microservice-a, microservice-b, and back.
curl --location 'http://172.22.224.1:8765/microservice-a'
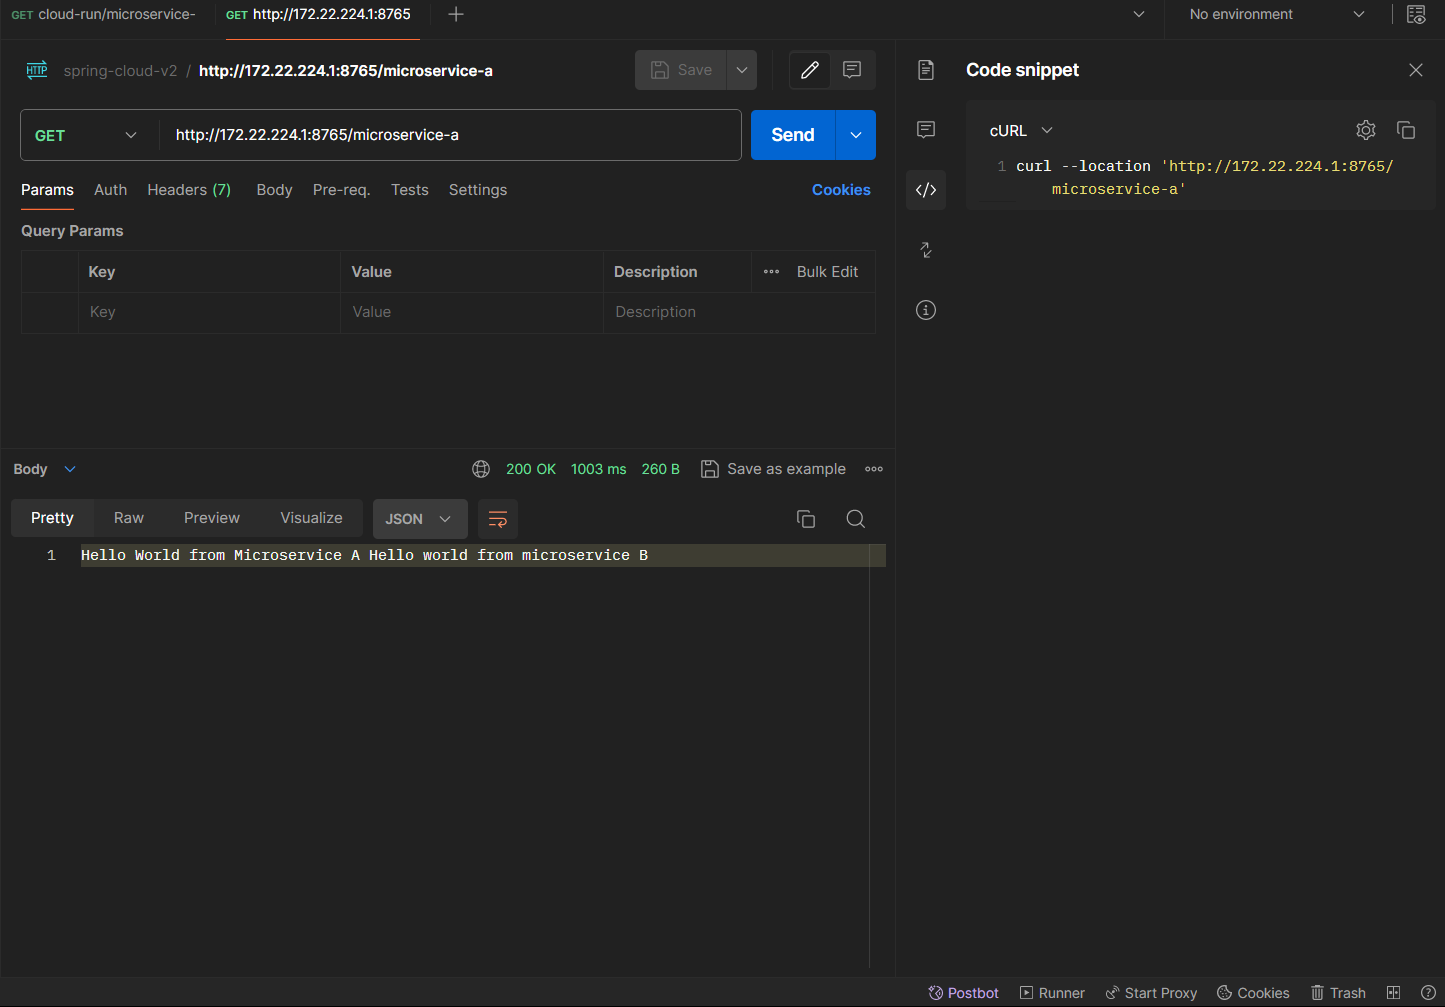
We can see the whole request travel through the microservices thanks to zipkin. Go to http://localhost:9411/zipkin/ .
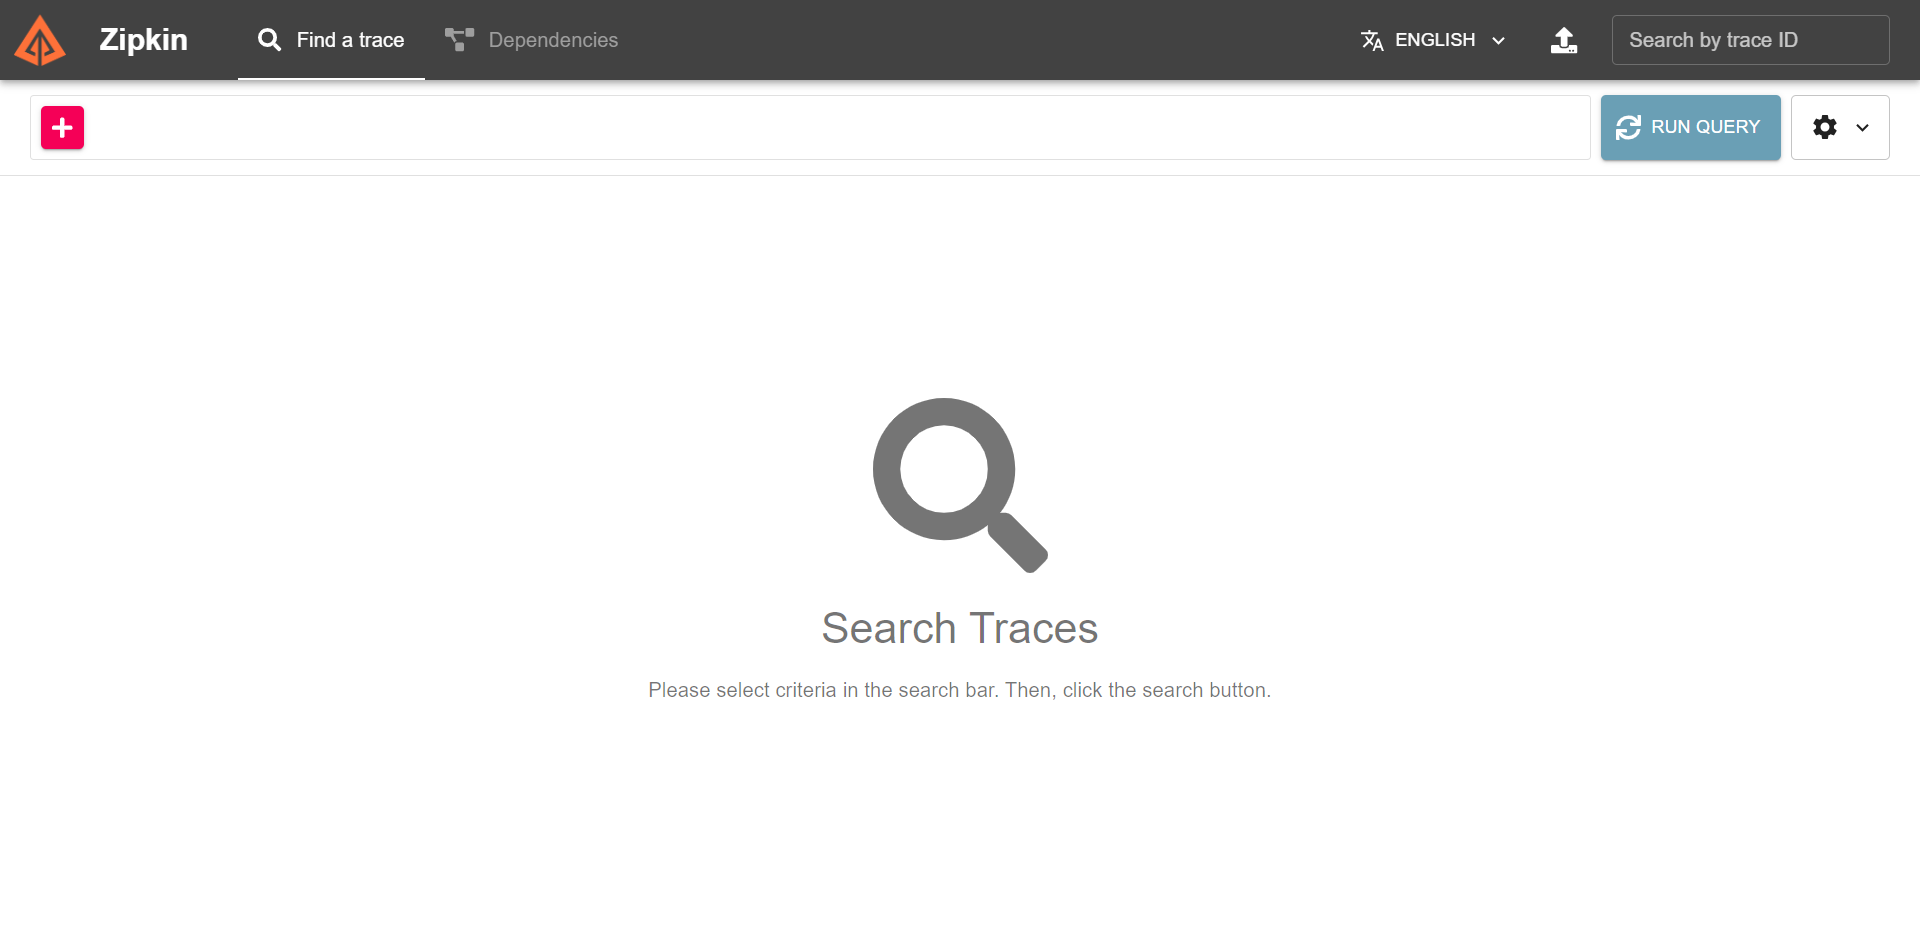
Click on “RUN QUERY” and you’ll find your request.

Click on “SHOW” to see more details.
