VPS 2: Let's Setup
Posted on January 28, 2025 • 9 minutes • 1767 words • Other languages: Español
This is the second part of my VPS blog series .
- Pick A VPS Provider
- Get A Plan According To Your Needs
- Choose An OS
- Setup Password And SSH
- Add A New User Account
- Point A DNS Record At The Server (AKA Get A Domain)
- Harden SSH
- System Package Updates
- Should We Create A Firewall Now?
- About Cloud Init
- Next Lecture
Pick A VPS Provider
When choosing a VPS provider, you’ll quickly discover there’s no shortage of options. However, three names you’ll frequently encounter in reviews, forums, and recommendations are:
- A2 Hosting : Known for its speed-optimized servers and developer-friendly tools.
- Hetzner : A budget-friendly European provider with a strong reputation for reliability.
- Hostinger : Offers affordable plans with a user-friendly interface, ideal for beginners.
There’s no “wrong” choice here. Your decision should depend on your specific needs, such as budget, server location, customer support expectations, or scalability requirements.
I chose Hostinger because two of my favorite programming content creators used it in the past.
Dreams of Code
Web Dev Cody
Get A Plan According To Your Needs
Courtesy of my current employer Devsu , I got the KVM2 plan for a 2-year term, which for the personal projects I have planned, it has good enough technical capabilities.
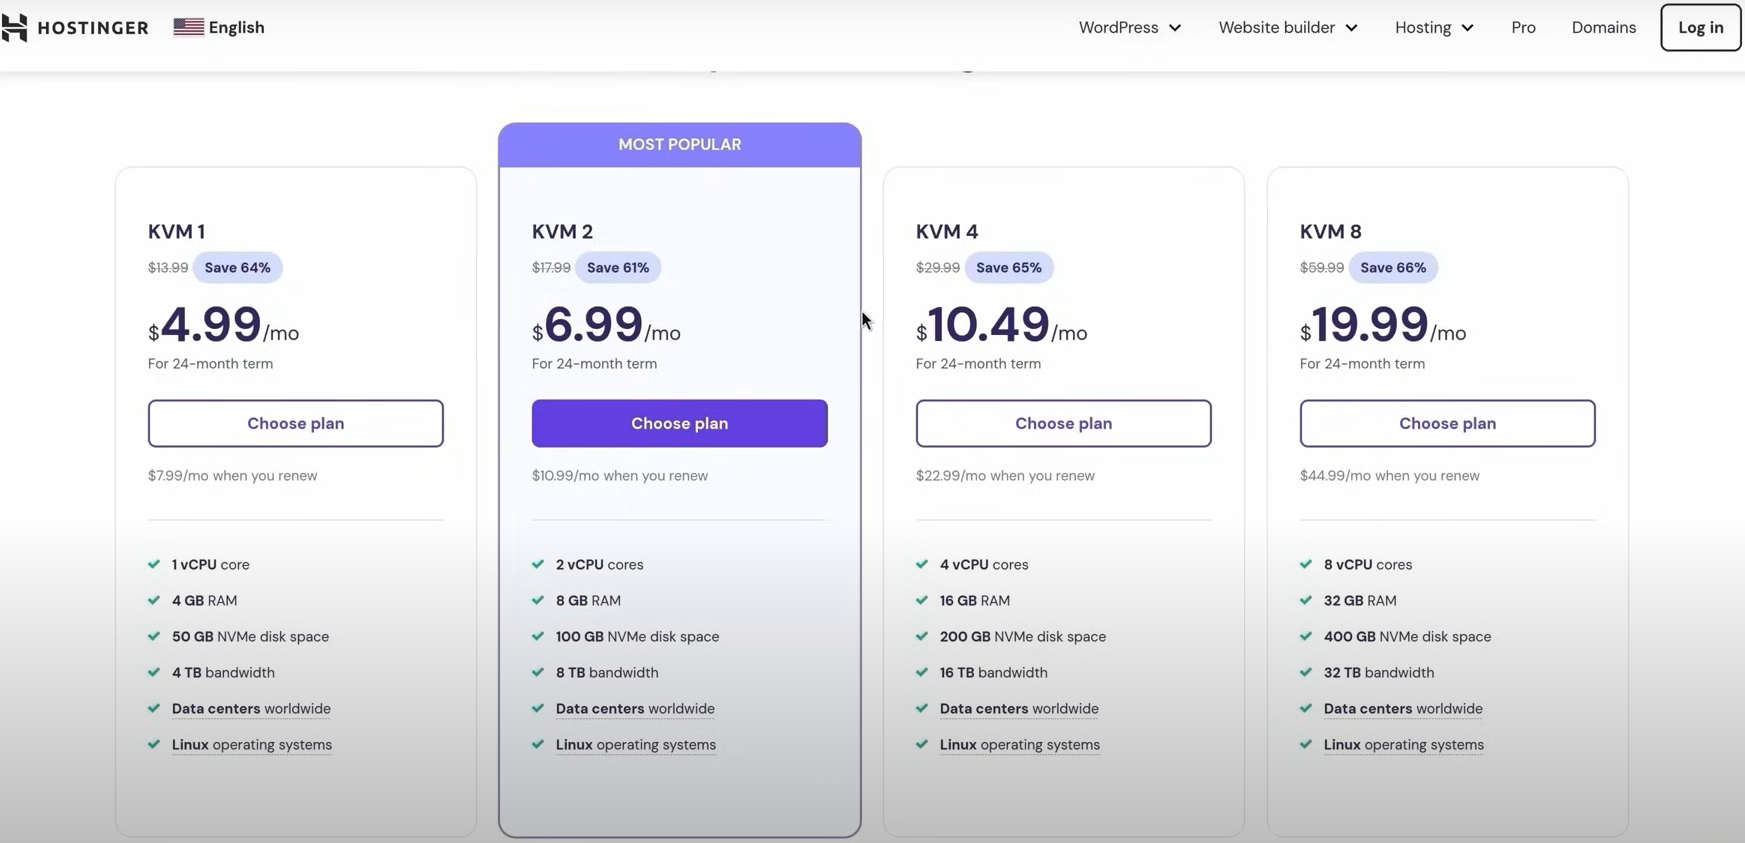
You can use my discount content creator coupon code… Nah, I’m not sponsored, I wish though (Hostinger, hit me up!)
- Tip: Go on YouTube, search “Hostinger VPS”, order results by date to get recent videos, and probably if the video is a good review of a creator with many subscribers, they might have a coupon code you can use. 10% discount is always welcomed.
Choose An OS
After getting the instance, you’re asked to choose an OS: In this blog series we are going with Ubuntu 24.04, as it is one of the most common OS when setting up a VPS.
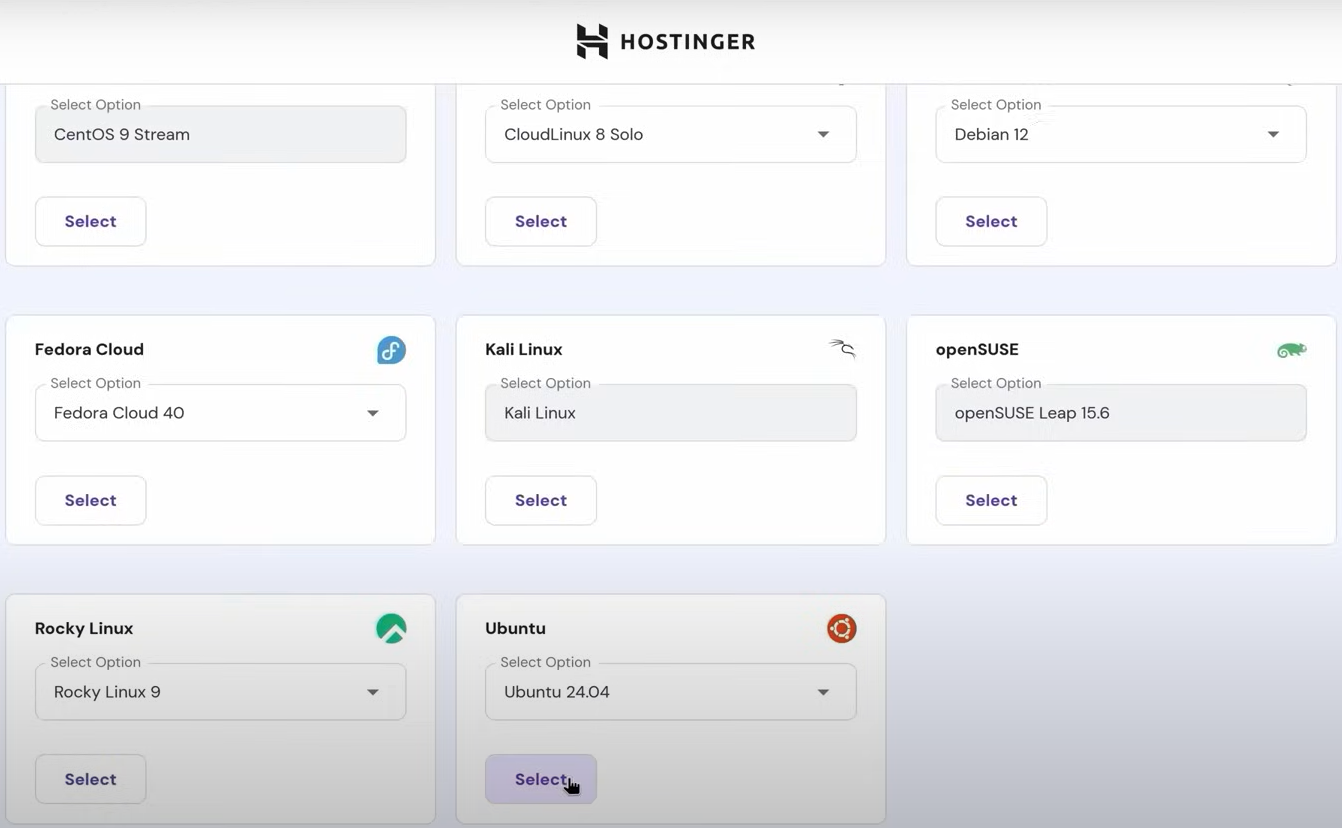
I don’t use Arch btw.

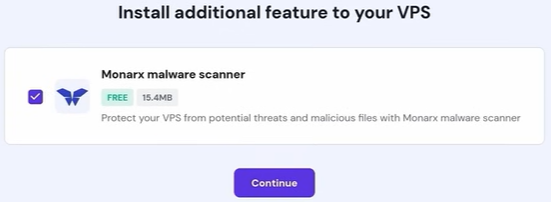
On the next screen, you’re offered a malware scanner. Leave it enabled, as it seems lightweight and it is free.
Setup Password And SSH
After choosing the OS, you are asked to set up a password for the root user:
- It is important to also add an SSH Key so you can later log in exclusively through SSH.
- Hostinger will provide you with instructions on how to generate and add an SSH key in case you are not sure.
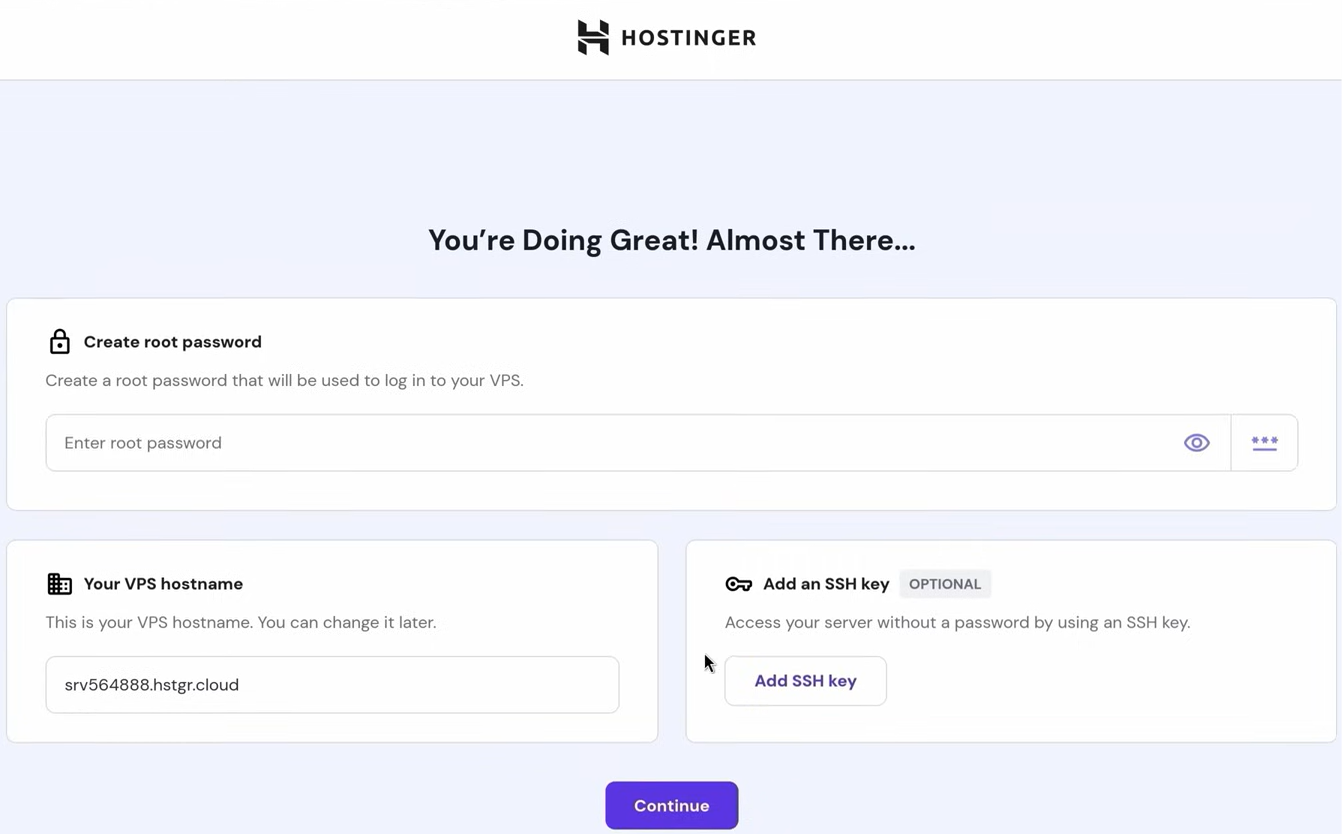
After finishing the set-up, wait a few minutes for your VPS instance to start. Then test the log in through SSH.
ssh root@vps-instance-ip-address
You can find your VPS instance IP address in the “Overview → VPS information” screen.
- In future examples I’ll be using my domain I acquired in the following step instead of using the IP address. Both are completely valid.
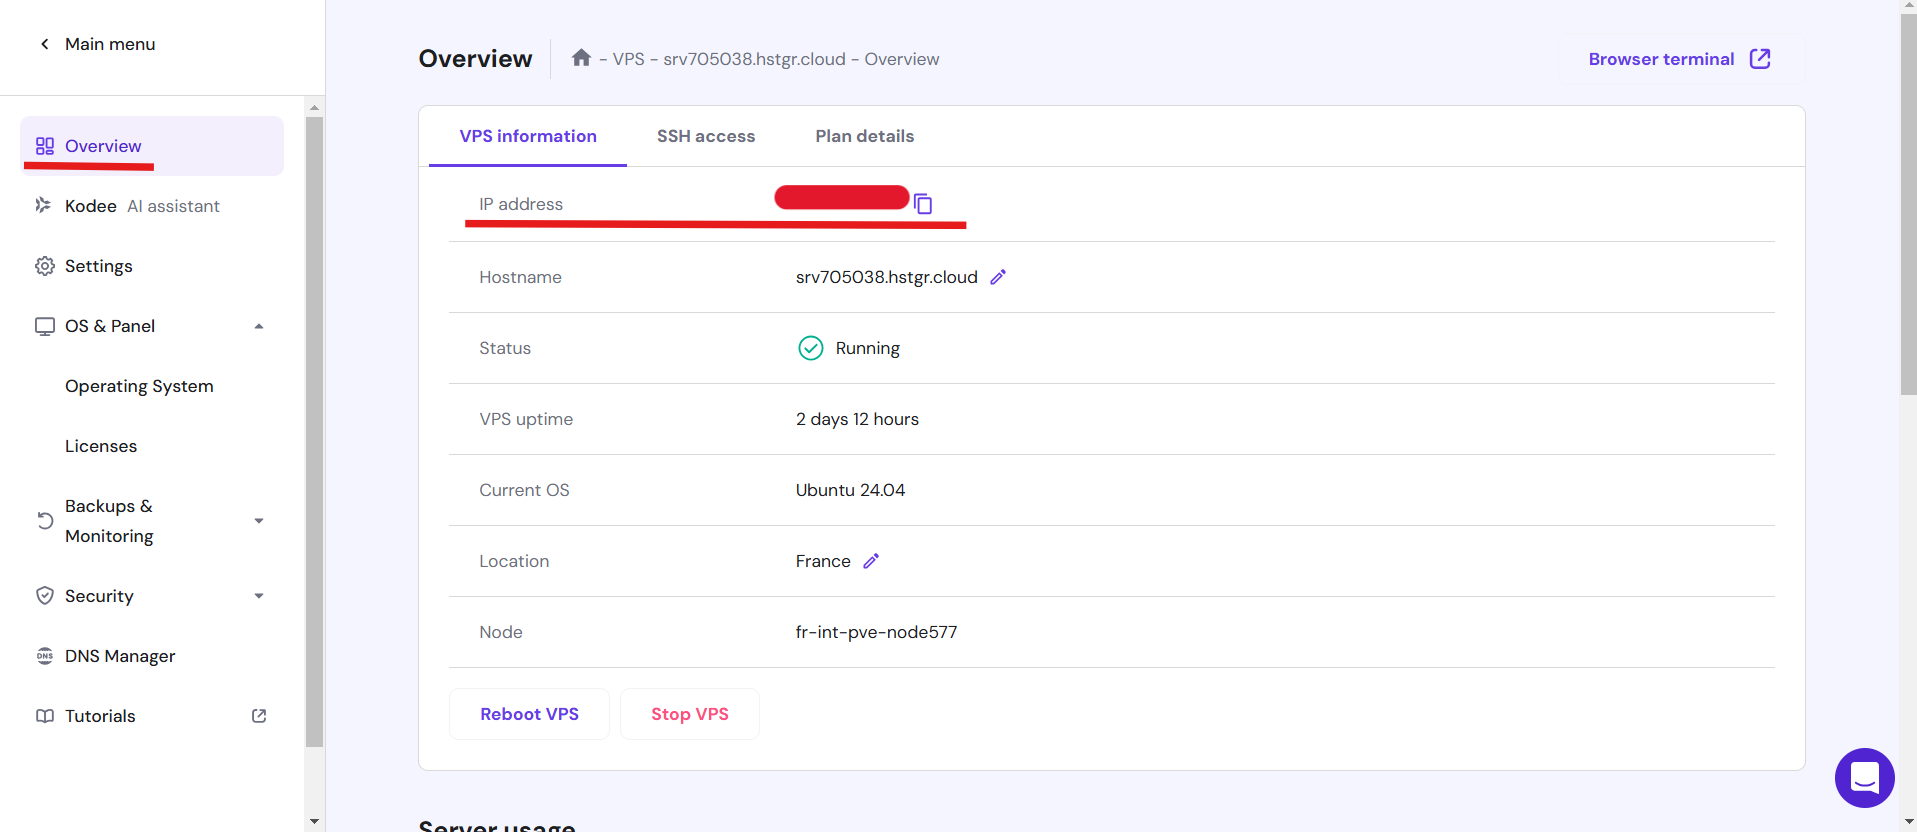
We have a VPS up, now what?
Add A New User Account
Working directly as the root user on your VPS is widely discouraged for security and practical reasons:
- Security risks: The root user has unrestricted access to your entire system. If compromised (e.g., via a brute-force attack or accidental exposure), attackers can wreak havoc. A non-root user limits potential damage by operating under the principle of least privilege.
- Accidental system changes: A single typo in a command (like
rm -rf /instead ofrm -rf ./) can delete critical system files when run as root. A regular user account acts as a safeguard against such catastrophic mistakes. - Audit trails: Using a dedicated user makes it easier to track actions in logs, especially if multiple people access the server. Root activity is harder to attribute to specific users, complicating troubleshooting.
- SSH hardening: Most attacks target the root user via SSH. By disabling root login and using SSH keys with a non-root account, you reduce your server’s exposure to brute-force attacks.
- Application requirements: Some tools and services (e.g., Docker) may refuse to run as root for security reasons. A standard user account ensures compatibility with such software.
Because of that, we will create a dedicated user account:
- Create a new user (e.g.,
adduser pollito). - Grant sudo privileges for administrative tasks (
usermod -aG sudo pollito). - Test it is working by switching to the new user (
su - pollito) and running a test sudo command (sudo ls /)
Point A DNS Record At The Server (AKA Get A Domain)
To connect your VPS to a domain name, you’ll need to configure DNS records. You can either use an existing domain you own or purchase a new one (Hostinger offers domain registration if you prefer an all-in-one solution). Here’s how to set it up:
- Prepare your domain
- Log in to your domain provider’s DNS management panel (e.g., Hostinger’s DNS dashboard).
- Remove any existing A records or CNAME records tied to the root domain (
@oryourdomain.com) that were auto-generated or are no longer needed. These often point to placeholder IPs.
- Add a new A record
- Create a new A record for the root domain (
@oryourdomain.com). - Set the value or destination field to your VPS’s public IP address.
- Save the record.
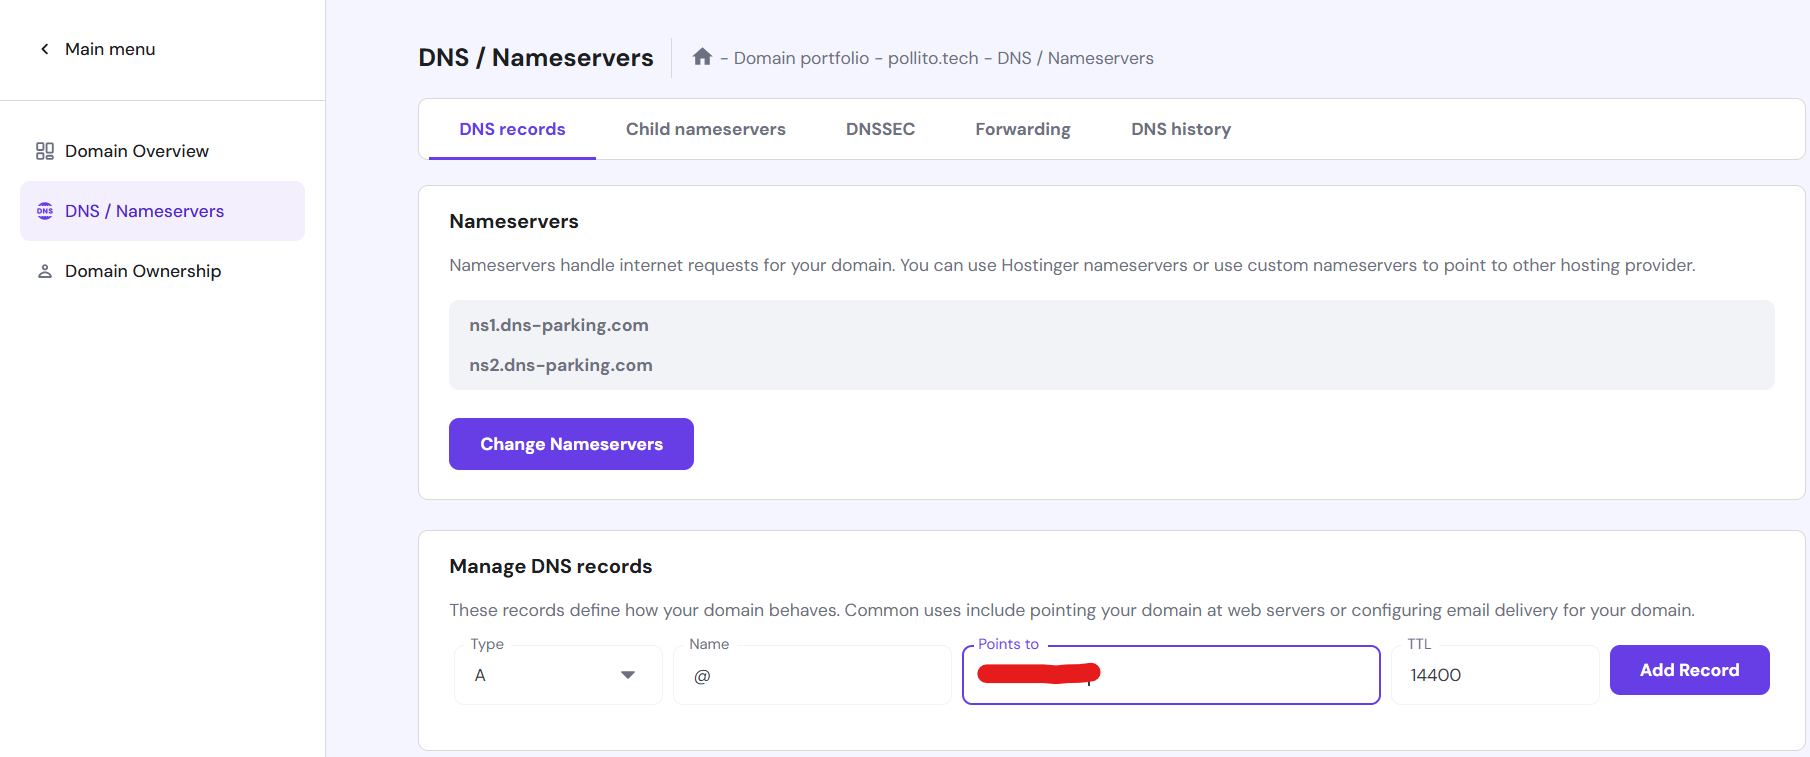
- Create a new A record for the root domain (
- Wait for propagation: DNS changes can take up to 24–48 hours to propagate globally. You can check progress using tools like
dig yourdomain.comorping yourdomain.com(once propagation is complete, it should resolve to your VPS IP).
Note: Avoid adding unrelated CNAME or A records for the root domain during this process, as they may conflict with your new configuration.
Harden SSH
Why?
Automated bots constantly scan the internet for SSH servers, attempting brute-force attacks using common credentials.
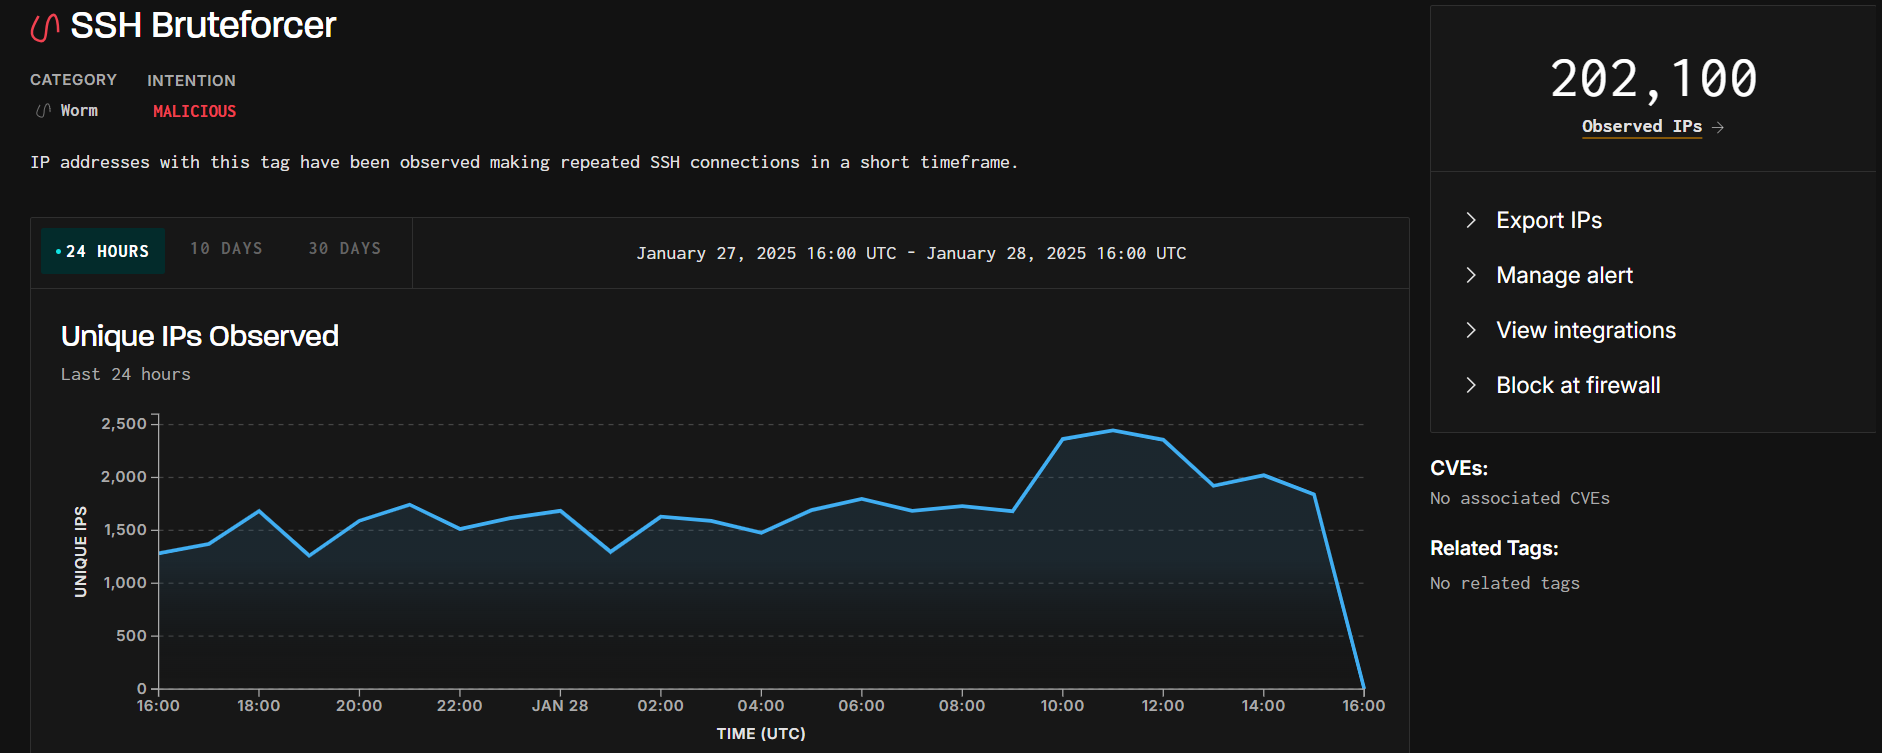 Visualization from viz.greynoise.io
You can even check right now in your VPS the failed login attempts that are happening by running:
sudo grep "Failed password" /var/log/auth.log
Here’s a brief view of mine. We can see a malicious IP trying to brute-force into the VPS by attempting to SSH as different common users on different ports.
2025-01-28T23:13:56.185011+00:00 srv705038 sshd[2491]: Failed password for invalid user admin from 51.20.5.208 port 44906 ssh2
2025-01-28T23:13:58.669177+00:00 srv705038 sshd[2493]: Failed password for invalid user admin from 51.20.5.208 port 44914 ssh2
2025-01-28T23:14:02.081755+00:00 srv705038 sshd[2495]: Failed password for invalid user admin from 51.20.5.208 port 44926 ssh2
2025-01-28T23:14:06.017747+00:00 srv705038 sshd[2497]: Failed password for invalid user admin from 51.20.5.208 port 44942 ssh2
2025-01-28T23:14:09.096008+00:00 srv705038 sshd[2499]: Failed password for invalid user admin from 51.20.5.208 port 43988 ssh2
2025-01-28T23:14:12.704576+00:00 srv705038 sshd[2501]: Failed password for invalid user admin from 51.20.5.208 port 44000 ssh2
2025-01-28T23:14:16.442531+00:00 srv705038 sshd[2503]: Failed password for invalid user admin from 51.20.5.208 port 53236 ssh2
2025-01-28T23:14:19.712289+00:00 srv705038 sshd[2505]: Failed password for invalid user admin from 51.20.5.208 port 53250 ssh2
2025-01-28T23:14:23.451288+00:00 srv705038 sshd[2507]: Failed password for invalid user admin from 51.20.5.208 port 53256 ssh2
2025-01-28T23:14:26.387938+00:00 srv705038 sshd[2509]: Failed password for invalid user admin from 51.20.5.208 port 57986 ssh2
2025-01-28T23:14:28.872091+00:00 srv705038 sshd[2511]: Failed password for invalid user admin from 51.20.5.208 port 57998 ssh2
2025-01-28T23:14:32.515499+00:00 srv705038 sshd[2515]: Failed password for invalid user pi from 51.20.5.208 port 58012 ssh2
2025-01-28T23:14:34.748936+00:00 srv705038 sshd[2517]: Failed password for invalid user ftp from 51.20.5.208 port 58020 ssh2
2025-01-29T12:44:07.296225+00:00 srv705038 sudo:  pollito : TTY=pts/0 ; PWD=/home/pollito ; USER=root ; COMMAND=/usr/bin/grep 'Failed password' /var/log/auth.log
To reduce the attack surface, we’ll harden SSH.
Ensure Your Non-Root User Has Your Public Key
If not, we could become soft locked out of the server.
Copy the SSH public key. An easy way to achieve that is to use the ssh-copy-id command:
ssh-copy-id pollito@pollito.tech
- Be sure to be
logoutof the VPS, you need to be in your local machine. - If you are on Windows, you can make this work using Git Bash .
Now try logging into the VPS and check to make sure everything is working.
ssh pollito@pollito.tech
Disable Password Login As The Root User
Ideally, now you would want to disable root login:
- In this case we can’t because a tool we will use later (Coolify ) needs to be able to remote into the server as the root user.
- There’s an experimental feature in which you can run Coolify as a non-root user . Nonetheless, I won’t dig further into this alternative as it is experimental.
So instead, we will disable password login as the root user by running the following commands:
- The root user can only log in using SSH keys (not passwords).
sudo sed -i -e '/^\(#\|\)PermitRootLogin/s/^.*$/PermitRootLogin without-password/' /etc/ssh/sshd_config - Ensure that public key authentication is enabled, which is needed for SSH key-based login.
sudo sed -i -e '/^\(#\|\)PubkeyAuthentication/s/^.*$/PubkeyAuthentication yes/' /etc/ssh/sshd_config - Disable password-based authentication, enforcing the use of SSH keys for login.
sudo sed -i -e '/^\(#\|\)PasswordAuthentication/s/^.*$/PasswordAuthentication no/' /etc/ssh/sshd_config - You have to repeat the previous step also in a Hostinger specific file. If you are running your VPS in a different provider, ignore this.
sudo sed -i -e '/^\(#\|\)PasswordAuthentication/s/^.*$/PasswordAuthentication no/' /etc/ssh/sshd_config.d/50-cloud-init.conf - Restart the SSH daemon (sshd) so that the changes take effect.
sudo systemctl reload ssh
System Package Updates
Make sure you are in an updated system before moving forward.
- Ensure that the system knows about the latest package versions.
sudo apt update - Upgrade all installed packages.
sudo apt upgrade -y
You’ll probably see a message indicating that services and/or containers need to be restarted.
- Reboot the VPS
sudo reboot
Should We Create A Firewall Now?

Ideally now you would want to create a firewall:
- In this case we can’t because once again, a tool we will use later (Coolify ) exposes its admin panel over http at port 8000 of the VPS.
- Once we configure HTTPS and domains (in the next blog, stay tuned), then we will create a firewall.
What we can do now is add protection against malicious IPs. Let’s go with Crowdsec
Crowdsec
-
Run the installation commands:
curl -s https://packagecloud.io/install/repositories/crowdsec/crowdsec/script.deb.sh | sudo bash
sudo apt-get install crowdsec
Now we are detecting malicious IPs but not blocking them. We need a bouncer.
-
Install a bouncer by running these commands:
curl -s https://install.crowdsec.net | sudo sh
sudo apt install crowdsec-firewall-bouncer-iptables
You can now check the table of blocked IPs.
cscli decisions list

About Cloud Init
When provisioning a VPS, tasks like creating a new user, hardening security (e.g., SSH key setup, firewall configuration), and installing system updates are repetitive but critical steps. Cloud Init exist to automate these processes
- By defining a cloud-config YAML file, you can script user creation, package updates, security policies, and more, ensuring consistency across deployments.
I know in Hetzner this is possible, as shown in this tutorial, minute 2:59 “Create a VPS with Hetzner and Set Up with Cloud Config”
However, Hostinger’s VPS offerings (at the time of writing) do not natively support Cloud Init out of the box. Workarounds might exist, but I haven’t done proper research

